A wedding is one of the most beautiful and emotionally rich days in a person’s life. It’s filled with love, family, laughter, tears, and countless memories worth preserving. One of the most meaningful ways to commemorate that special day is by creating a wedding book—a carefully crafted keepsake that tells the full story of the wedding, from proposal to honeymoon. Whether you’re a bride or groom looking to capture every detail or a designer creating a custom wedding book for a client, this guide will walk you through every step of how to create a book for a wedding.
What Is a Wedding Book?
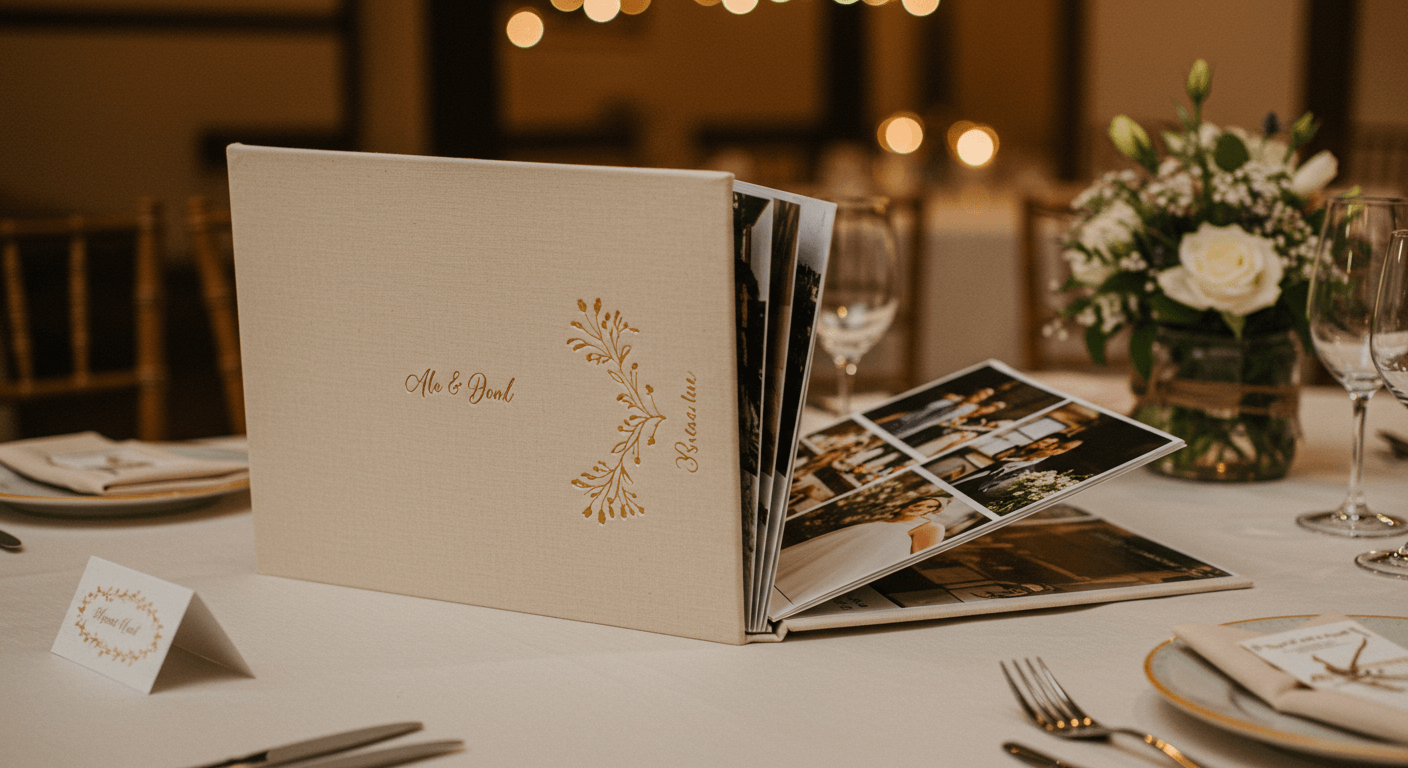
A wedding book is a personalized photo and storybook that showcases key moments from a couple’s wedding journey. It can include engagement photos, bridal shower highlights, ceremony snapshots, vows, speeches, the reception, and honeymoon adventures. More than a simple photo album, a wedding book is a curated narrative that blends visual storytelling with heartfelt text, quotes, and memorabilia. It’s a tangible reflection of the couple’s love story—one that can be cherished for generations.
Step 1: Decide on the Purpose and Theme
The first step in creating a wedding book is to define its purpose. Is it a photo-heavy memory book? A storytelling-style wedding journal? A gift for family and friends? Or a formal coffee-table book?
From there, choose a theme that reflects the couple’s style. For instance:
- Romantic & Elegant: Soft florals, scripted fonts, and pastel tones.
- Rustic & Boho: Natural textures, earthy tones, and handwritten text.
- Modern & Minimal: Clean lines, monochromatic schemes, and structured layout.
- Cultural & Traditional: Elements like ethnic patterns, family heritage symbols, or traditional color palettes.
Aligning your design theme with the couple’s wedding style ensures the book feels cohesive and deeply personal.
Step 2: Gather All Materials and Content
A great wedding book begins with thorough preparation. Collect everything you want to include:
Photos:
- Engagement shoot
- Wedding invitations or save-the-date
- Pre-wedding rituals (like mehndi, tea ceremony, or bachelor/bachelorette parties)
- Behind-the-scenes (dressing up, venue prep)
- Ceremony (vows, kiss, exchange of rings)
- Group shots and family portraits
- Reception (speeches, dances, cake cutting)
- Honeymoon highlights
Text Content:
- The couple’s love story (how they met, first date, proposal)
- Quotes or vows
- Speech excerpts (from bride, groom, best man, parents)
- Timeline of events
- Song lyrics or meaningful poems
Design Assets:
- Wedding logo or monogram
- Color palette used in the wedding
- Calligraphy elements
- Background textures (floral, lace, fabric, wood)
Once everything is organized, store it in clearly labeled folders for quick access during the design process.
Step 3: Choose the Right Tool or Software
There are many platforms to design a wedding book, ranging from beginner-friendly to professional-grade tools.
Beginner Tools:
- Shutterfly, Mixbook, Snapfish: Great for drag-and-drop photo books with beautiful templates.
- Canva: Easy to use, with wedding-specific templates and creative freedom.
Advanced Tools:
- Adobe InDesign: Offers full creative control for professionals.
- Affinity Publisher: A cost-effective alternative to InDesign.
- Blurb BookWright: Ideal for print-on-demand, integrates well with Lightroom.
Choose based on your comfort level and the type of book you’re creating. If you want to sell or gift a high-quality, hardcover printed book, opt for professional software that offers CMYK export and bleed settings.
Step 4: Plan the Book’s Structure and Layout
A wedding book typically follows a chronological or thematic layout. Here’s a sample structure you can follow:
- Cover Page: Names, wedding date, optional quote or emblem.
- Dedication Page: A note from the couple or a heartfelt thank-you.
- The Love Story: How they met, first impressions, proposal story.
- Pre-Wedding Celebrations: Engagement party, bridal shower, or pre-events.
- Getting Ready: Behind-the-scenes photos of both parties getting ready.
- First Look or Ceremony: Emotional highlights, vows, first kiss.
- Reception: Decor, speeches, dances, guests enjoying themselves.
- Family & Friends: Candid or formal portraits.
- Details Spread: Venue shots, decor, menu, cake, rings.
- The Honeymoon: Travel photos, new adventures.
- Final Page: A message about the future, or a quote about lasting love.
Each section can have a unique layout style while maintaining design consistency through fonts, margins, and color schemes.
Step 5: Design the Cover and Title Page
The cover sets the tone for the entire book. Consider using:
- A full-bleed image of the couple
- Their names and wedding date in an elegant font
- Embossed or foil-stamped effects if printed professionally
The title page (first interior page) can mirror the invitation design or feature a minimalist text introduction like:
“The Story of Us: John & Emily — June 12, 2024, Napa Valley”
Keep this page clean and impactful.
Step 6: Create Consistent Page Layouts
Consistency is key to a visually pleasing wedding book. Here are some layout tips:
- Use grids to align images and text blocks
- Stick to 2-3 fonts max (one for headings, one for body, one optional for script accents)
- Alternate single-image spreads with collage pages
- Include white space to avoid a cluttered feel
- Use photo bleed pages for impact, especially on high-emotion moments like the first dance or first kiss
Templates from Canva, InDesign, or Mixbook can help maintain a uniform look across pages.
Step 7: Add Captions, Quotes, and Personal Notes
Your wedding book becomes a storybook when it includes text beyond dates and names. Add context with:
- Captions under images (“Bridal party prepping at 10:00 a.m.”)
- Quotes from love poems or wedding vows
- Speech highlights (“My best friend has found her soulmate…”)
- Personal reflections on moments of joy, surprise, or gratitude
These touches bring out the emotion and narrative, making the book more than just a photo collection.
Step 8: Use Color and Texture Strategically
Incorporate the wedding color palette into your design. This ties the book to the event itself.
- Use soft backgrounds with subtle textures (linen, lace, watercolor)
- Frame photos in accent colors like gold, burgundy, or pastel pink
- Add floral or botanical illustrations for romance and softness
Make sure color usage doesn’t overpower your photos—always let the images shine.
Step 9: Proof and Edit Thoroughly
Once your design is complete, step away from it for a day before reviewing. Then, go through it thoroughly:
- Spelling and grammar check for text
- Image resolution (300 DPI for print)
- Margins and bleeds to ensure nothing gets trimmed
- Consistent spacing and alignment
- Color calibration for screen vs. print
Ask a second pair of eyes (like a friend or professional editor) to review for layout consistency and typos.
Step 10: Choose Printing and Binding Options
The final product depends heavily on how you print and bind the book. Key options include:
Print Type:
- Photo Paper: Glossy, vibrant, ideal for high-impact images
- Matte Paper: Soft finish, reduces glare, elegant feel
- Textured Paper: Adds richness, great for vintage themes
Binding Styles:
- Layflat: Perfect for panoramic photos and two-page spreads
- Perfect Binding: Like paperback books, cost-effective
- Hardcover with Dust Jacket: Premium and gift-worthy
- Leather or Linen Cover: Timeless and elegant
Work with companies like Blurb, Artifact Uprising, Printique, or MILK Books for luxury options. They offer customizations like foil stamping, embossing, and archival-quality paper.
Step 11: Order Extra Copies or Create Digital Versions
Wedding books make excellent gifts for parents, in-laws, and close friends. Order multiple physical copies or create digital versions:
- Export as PDF or EPUB
- Create a flipbook version with tools like Issuu
- Share via email, USB, or cloud storage
Some couples even create a private wedding website with the digital book embedded—adding video, guest messages, or a blog.
Step 12: Store, Preserve, and Display
Once your wedding book arrives, store it properly:
- Keep it in a cool, dry place away from direct sunlight
- Use archival sleeves or boxes for long-term storage
- Place it on your coffee table or bookshelf as a conversation piece
You might also create a mini version for your nightstand or a travel-size duplicate for reminiscing on honeymoons or anniversaries.
Final Thoughts: Your Love Story, Preserved Forever
Creating a wedding book is more than a design project—it’s the preservation of one of the most meaningful days in a couple’s life. Each photo, quote, and layout decision adds depth to the storytelling. Whether it’s a sleek hardcover designed with professional tools or a heartfelt DIY book created with love, the goal is the same: to freeze your wedding memories in a form that lasts forever.
A well-made wedding book becomes a cherished heirloom, passed down through generations. It reminds you not only of the event itself but of the love and promise you committed to. Don’t let your wedding photos gather digital dust—create a book that tells your story the way it deserves to be remembered.
